Introduction to Building a Wooden Bed Frame
Building a wooden bed frame is a challenging project that requires advanced techniques, precision, and attention to detail. In this article, we will provide a step-by-step guide on how to build a wooden bed frame using traditional joinery methods and professional finishing techniques.
Planning and Preparation
Before starting the project, it is essential to plan and prepare carefully. This includes selecting the right type of wood, designing the bed frame, and creating a detailed cut list. For inspiration and guidance, you can refer to resources such as Ted Woodworking, which offers a wide range of plans and tutorials for woodworking projects.
When designing the bed frame, consider the size, style, and material you want to use. Make sure to take into account the thickness of the wood and the type of joinery you will use. It is also crucial to create a detailed cut list to ensure that you have all the necessary pieces and to avoid waste.
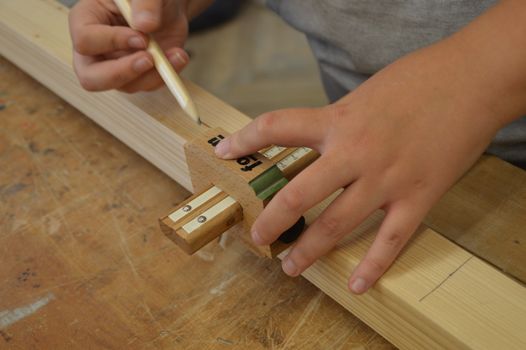
Cutting and Joinery
Cutting and joinery are critical steps in building a wooden bed frame. To achieve a professional finish, it is essential to use precise cutting techniques and traditional joinery methods such as mortise and tenon, dovetail, and dado joints.
- Use a table saw or a miter saw to make precise cuts, and a jointer to ensure that the wood is flat and smooth.
- Use a mortise and tenon joint to connect the headboard and footboard to the side rails.
- Use a dovetail joint to connect the drawer slides to the bed frame.
- Use a dado joint to connect the shelves to the bed frame.
Assembly and Sanding
Once all the pieces are cut and joined, it is time to assemble the bed frame. Use clamps to hold the pieces together while you attach them using screws or nails. Make sure to use a level to ensure that the bed frame is even and plumb.
After assembly, sand the entire bed frame to smooth out any rough edges or surfaces. Use a belt sander or an orbital sander to sand the wood, and a hand sanding block to sand the intricate details.
Finishing and Installation
Finishing is the final step in building a wooden bed frame. Apply a stain or a finish to the wood to protect it and enhance its appearance. Use a polyurethane or a wax to seal the wood and give it a glossy finish.
Once the finish is dry, install the bed frame in the bedroom. Make sure to attach it to the wall to prevent it from tipping over. Add the mattress and the bedding, and your new wooden bed frame is ready to use.
Conclusion
Building a wooden bed frame is a challenging project that requires advanced techniques, precision, and attention to detail. By following these step-by-step plans and using traditional joinery methods and professional finishing techniques, you can create a beautiful and sturdy bed frame that will last for years to come.
Frequently Asked Questions
Here are some frequently asked questions about building a wooden bed frame:
- Q: What type of wood is best for building a bed frame? A: The best type of wood for building a bed frame depends on the style and design you want to achieve. Popular options include oak, maple, and cherry.
- Q: How do I ensure that my bed frame is sturdy and durable? A: To ensure that your bed frame is sturdy and durable, use traditional joinery methods such as mortise and tenon, dovetail, and dado joints, and attach the bed frame to the wall to prevent it from tipping over.
- Q: Can I build a wooden bed frame without any experience in woodworking? A: While it is possible to build a wooden bed frame without any experience in woodworking, it is not recommended. Building a bed frame requires advanced techniques, precision, and attention to detail, and can be challenging for beginners.
🔨 Want 16,000+ Woodworking Plans?
Get instant access to step-by-step plans with blueprints and cut lists.
Get Instant Access →