Introduction
\nCreating your own wood wall art is an excellent way to personalize your space and showcase your woodworking skills. This step-by-step guide will walk you through the process of making beautiful wood wall art while highlighting common mistakes to avoid and providing troubleshooting tips along the way.
\n\nMaterials Needed
\n- \n
- Wood boards (pine, plywood, or any wood of your choice) \n
- Wood glue \n
- Wood stain or paint \n
- Sandpaper (various grits) \n
- Measuring tape \n
- Pencil \n
- Clamps \n
- Power tools (saw, drill, etc.) \n
- Finish (polyurethane or varnish) \n
Step-by-Step Guide
\n\nStep 1: Plan Your Design
\nBefore you start cutting any wood, spend some time sketching your design on paper. Visualizing your idea will help you determine the dimensions and the amount of wood required. A common mistake here is not accounting for the final size, which can lead to a project that doesn’t fit your intended space.
\n\nStep 2: Choose Your Wood
\nSelect wood that matches your desired aesthetic and is appropriate for wall art. Softwoods like pine are great for beginners. Ensure you check for defects like knots or cracks which can weaken your project. A common mistake is using warped boards, so take the time to inspect your materials.
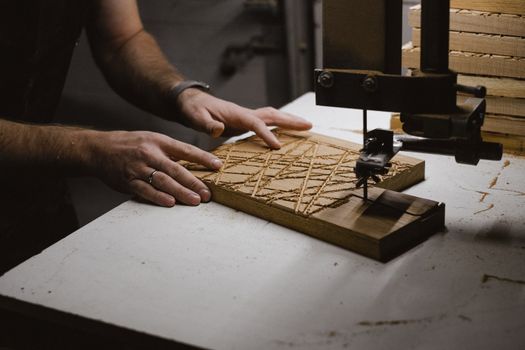
\n\nStep 3: Cut the Wood
\nUsing a saw, cut your wood to the desired sizes according to your design. If you’re not comfortable with power tools, consider using hand tools for more control. A mistake many beginners make is rushing this step. Take your time to ensure accurate cuts; inaccurate cuts can lead to fitting issues.
\n\nStep 4: Sand the Edges
\nSand all edges of your wood pieces to remove any splinters or rough spots. Start with a coarse grit and gradually move to a finer grit for a smooth finish. One common mistake is skipping this step, which can result in splintered edges that detract from the overall look.
\n\nStep 5: Assemble the Pieces
\nUse wood glue to attach your pieces together according to your design. Clamp the pieces securely while the glue dries to ensure a strong bond. A common mistake is applying too much glue, which can create a mess and weaken the bond. Use just enough to cover the surface without excess oozing out.
\n\nStep 6: Finish the Surface
\nOnce the glue has dried, it’s time to apply a finish. Whether you choose to stain or paint, this step enhances the wood’s beauty and protects it. A common mistake is applying finish too thickly or not allowing adequate drying time between coats. Follow the manufacturer's instructions for best results.
\n\nStep 7: Mount the Art
\nNow that your wall art is finished, it’s time to hang it. Choose the right mounting hardware based on the weight of your piece. A mistake to avoid is hanging heavy pieces without proper support, which can lead to falls and damage.
\n\nCommon Mistakes and Troubleshooting Tips
\nEven seasoned woodworkers can make errors during projects. Here are some common mistakes and how to fix them:
\n- \n
- Inaccurate Measurements: Always double-check your measurements before cutting. If you find a piece is too short, you may be able to make a patch or join two pieces together. \n
- Glue Not Holding: If your pieces don’t seem to be sticking, it could be due to excess glue or insufficient clamping. Make sure to clean up any excess and apply clamps tightly. \n
- Poor Finish: If your finish is blotchy or uneven, it might be due to inadequate sanding or applying too much product. Sand lightly and apply thin coats, allowing each to dry completely. \n
Using Plans for DIY Projects
\nIf you're looking for structured guidance, consider using resources like Ted Woodworking, which offers a plethora of detailed plans for woodworking projects, including wall art. Having a plan can help you avoid many common pitfalls and streamline your building process.
\n\nConclusion
\nCreating DIY wood wall art can be a rewarding experience that adds a personal touch to your home. By following this guide and being mindful of common mistakes, you can create a stunning piece that showcases your creativity and craftsmanship.
\n\nFAQ
\n- \n
- What type of wood is best for wall art? Pine and plywood are popular choices for beginners due to their affordability and ease of use. \n
- How do I keep my wood art from warping? Ensure that your wood is properly dried and stored in a climate-controlled environment to minimize warping. \n
- Can I use leftover wood for my project? Yes! Upcycling leftover wood can be a great way to create unique pieces while being environmentally friendly. \n
📚 Related Articles
🔨 Want 16,000+ Woodworking Plans?
Get instant access to step-by-step plans with blueprints and cut lists.
Get Instant Access →