Introduction
Building outdoor furniture and structures can be a rewarding hobby, but it also comes with the responsibility of ensuring that your creations withstand the elements. Without proper weatherproofing, wood can warp, crack, or rot from exposure to moisture and UV rays. In this guide, we will walk you through essential techniques for weatherproofing your outdoor wood projects, making them durable and long-lasting.
Understanding the Risks
Before diving into the weatherproofing process, it's important to understand what you're protecting your wood from:
- Moisture: Rain and humidity can lead to mold, mildew, and rot.
- UV Rays: Sunlight can cause the wood to fade and lose its natural luster.
- Temperature Changes: Extreme heat and cold can cause wood to expand and contract, leading to cracks.
Essential Weatherproofing Techniques
Here are some straightforward techniques to weatherproof your outdoor wood projects effectively:
1. Choose the Right Wood
The first step in weatherproofing is selecting the right type of wood. Some species are naturally more resistant to weathering:
- Cedar: Naturally resistant to rot and insects.
- Redwood: Offers good resistance to moisture and UV damage.
- Treated Pine: Pressure-treated for enhanced durability against the elements.
2. Sanding and Preparing the Wood
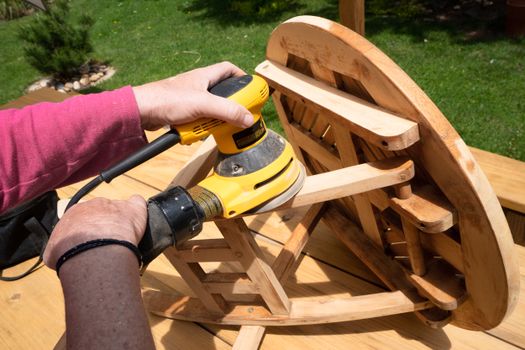
Before applying any protective finish, ensure you sand the wood surfaces to create a smooth finish. Use a medium-grit sandpaper to remove any rough spots, followed by a fine-grit sandpaper for a polished feel. This process helps the weatherproofing products adhere better.
3. Applying a Weatherproofing Finish
There are various products available to weatherproof wood, including stains, sealants, and paints. Here’s how to apply them:
- Select a Weatherproofing Product: Choose between a clear sealant for natural wood look or a stain for color.
- Test First: Always test your product on a small, inconspicuous area of wood.
- Apply Evenly: Use a brush or roller to apply the product evenly across the surface. Follow the manufacturer's instructions for the number of coats required.
- Drying Time: Allow ample drying time between coats to ensure proper adhesion.
4. Sealing Joints and Cracks
Sealing joints and cracks is essential to prevent moisture infiltration. Use a quality exterior wood glue or caulk to fill any gaps in your project. This step is especially important for furniture with multiple parts, like tables and chairs.
5. Regular Maintenance
Even after weatherproofing, outdoor wood furniture requires regular maintenance:
- Inspect Annually: Check for signs of wear, including peeling paint or signs of rot.
- Reapply Finish: Depending on the product used, you may need to reapply your weatherproofing finish every 1-3 years.
- Clean Regularly: Clean your furniture with mild soap and water to remove dirt and debris.
Using Plans for Your Outdoor Projects
For those looking for detailed plans to guide you through your outdoor wood projects, consider resources like Ted Woodworking. Ted Woodworking offers a wide range of project plans that can help you get started on your next outdoor build with confidence, ensuring you have a solid foundation and approach to weatherproofing.
Conclusion
Weatherproofing your outdoor wood projects doesn't have to be complicated. By following these essential techniques, you can protect your creations from the elements and prolong their life. Remember, the key to successful weatherproofing is choosing the right materials, applying quality finishes, and maintaining your furniture regularly. Happy woodworking!
FAQ
1. How often should I weatherproof my outdoor wood furniture?
It's recommended to inspect and potentially reapply your weatherproofing finish every 1-3 years, depending on exposure to the elements.
2. Can I use regular paint to weatherproof wood?
While you can use regular paint, it's advisable to select a paint specifically designed for outdoor use, as it will provide better protection against moisture and UV rays.
3. What should I do if my wood furniture gets damaged?
If your wood furniture gets damaged, assess the extent of the damage. For minor issues, sanding and reapplying weatherproofing may suffice. For significant damage, you may need to replace the affected parts or apply wood filler before refinishing.
📚 Related Articles
🔨 Want 16,000+ Woodworking Plans?
Get instant access to step-by-step plans with blueprints and cut lists.
Get Instant Access →