Why Is Sanding Crucial for High-Quality Wood Projects?
Sanding is often seen as a mundane task in woodworking, but it is one of the most critical steps in achieving high-quality results for your projects. Whether you're working on a budget build or a more elaborate piece of furniture, understanding the significance of sanding can make a world of difference. In this article, we will explore why sanding is essential, especially when working with cost-saving materials and budget-friendly techniques.
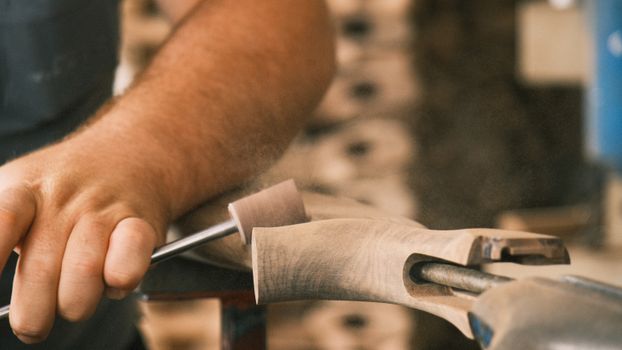
The Importance of Sanding
When you think about woodworking, you might focus on the design, the type of wood, or the tools you need. However, the finish of your project is equally important, and sanding plays a pivotal role in achieving that polished look. Here are some key reasons why sanding is crucial:
- Surface Preparation: Sanding helps to prepare the surface of the wood for finishing. It removes imperfections, such as saw marks, rough patches, and any other blemishes that could detract from the final appearance.
- Enhancing Adhesion: When applying stains, paints, or finishes, a smooth surface allows these products to adhere more effectively. Sanding creates a texture that improves the bonding of the finish to the wood.
- Creating a Smooth Finish: A well-sanded surface results in a smooth finish that feels good to the touch and looks professional. This is especially important for furniture that will be used frequently.
- Removing Dust and Debris: Sanding helps to eliminate dust and debris that can accumulate during the woodworking process, ensuring that your final product is clean and free of unwanted particles.
- Preparing for Staining: If you plan to stain your wood, sanding is a must. It opens up the wood grain, allowing the stain to penetrate more evenly and deeply, resulting in a richer color.
Cost-Saving Tips for Effective Sanding
For those on a budget, effective sanding doesn't have to break the bank. Here are some cost-saving tips to ensure you achieve great results without overspending:
- Invest in Quality Sandpaper: While it may be tempting to buy the cheapest sandpaper available, investing in quality products can save you money in the long run. High-quality sandpaper lasts longer and does a better job of sanding, reducing the amount of time you need to spend on the task.
- Use Your Tools Wisely: If you own a power sander, use it for larger surfaces to save time and effort. For smaller areas or intricate details, hand sanding is often more effective and allows for greater control.
- Recycle Sandpaper: You can often reuse sandpaper several times before it becomes ineffective. To extend its life, clean it by tapping it against a hard surface or using a sanding block to keep it even.
- Choose Affordable Wood Types: When selecting wood for your projects, consider using less expensive types that still provide good results. Pine, for example, is budget-friendly and sands well, making it an excellent choice for beginners.
- DIY Sanding Blocks: Instead of purchasing expensive sanding blocks, make your own using scrap wood and adhesive-backed sandpaper. This allows for customization and can save you money.
Achieving a Professional Finish
To achieve a professional finish on your wood projects, it's important to follow a systematic sanding process:
- Start with Coarse Grit: Begin with a coarse grit sandpaper (around 80 to 100 grit) to remove any rough spots and imperfections.
- Progress to Finer Grits: Gradually move to finer grits (120 to 220 grit) to smooth the surface. Each pass with finer grit will help refine the finish.
- Sand in the Direction of the Grain: Always sand in the direction of the wood grain to prevent scratches and achieve a more natural finish.
- Clean Between Grits: After sanding with each grit, clean the surface to remove dust and debris before moving to the next finer grit.
- Final Touches: For the last pass, consider using an ultra-fine sandpaper (320 grit or higher) to achieve an exceptionally smooth finish, especially if you will be applying a clear coat or stain.
Using Plans from Ted Woodworking
If you're looking for project ideas and detailed plans that emphasize quality, consider resources like Ted Woodworking. This platform offers a vast library of plans, perfect for both beginners and seasoned woodworkers, ensuring that your budget builds not only look great but are also structurally sound and well-designed.
Conclusion
Sanding is a crucial step in woodworking that should never be overlooked, especially when working on budget builds. By investing time and effort into sanding, you can transform your projects from ordinary to extraordinary without breaking the bank. Remember, a high-quality finish is a reflection of your craftsmanship, so take the time to sand properly and enjoy the fruits of your labor!
FAQ
1. How often should I sand my woodworking projects?
It depends on the project and the type of finish you are applying. Generally, you should sand at least once between each coat of paint or finish, but always sand before applying a final coat for the best results.
2. Can I skip sanding if I'm using a pre-finished wood?
While pre-finished wood may require less sanding, it is still advisable to lightly sand the surface to ensure proper adhesion of any additional finishes or stains.
3. What is the best grit sandpaper for finishing?
For finishing, a grit between 220 and 320 is typically recommended, depending on the wood type and the desired smoothness of the finish.
📚 Related Articles
🔨 Want 16,000+ Woodworking Plans?
Get instant access to step-by-step plans with blueprints and cut lists.
Get Instant Access →