How to Build a Custom Bookshelf in 5 Easy Steps
Building a custom bookshelf can be an exciting and fulfilling project, especially when you want it to reflect your personal style while serving a functional purpose. In this guide, we will walk you through five easy steps to create a beautiful and sturdy bookshelf, focusing on advanced techniques that emphasize joinery, precision, and a professional finish.
Step 1: Planning and Design
Before you dive into construction, proper planning is essential. You need to determine the dimensions of your bookshelf, the type of wood you’ll use, and any design elements you want to incorporate.
- Choose Your Wood: Popular choices include oak, maple, or birch for their durability and aesthetics.
- Design Layout: Sketch a rough design, considering factors like shelf spacing and height. A taller bookshelf may require more robust supports.
- Joinery Techniques: Decide on the joinery methods that will best suit your design. Options include dovetail joints, mortise and tenon, or pocket holes.
For detailed plans and inspiration, you can check out Ted Woodworking, which offers a vast array of woodworking plans.
Step 2: Gather Your Materials and Tools
With your design in hand, it’s time to gather your materials and tools. Here’s a list to get you started:
- Materials:
- Wood boards (choose based on your design)
- Wood glue
- Screws or nails (if applicable)
- Wood finish (stain or paint)
- Tools:
- Table saw or circular saw
- Drill
- Router (for edge profiles)
- Sanders (orbital and belt sander)
- Clamps
- Measuring tape and square
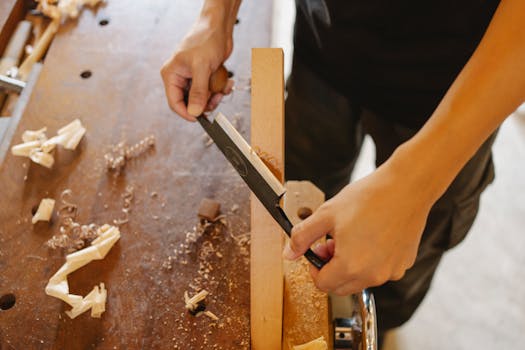
Step 3: Cutting and Preparing the Wood
Precision cutting is crucial for a professional-looking bookshelf. Use your saw to cut your wood according to the dimensions specified in your design.
- Measure Twice, Cut Once: Always double-check your measurements to avoid mistakes.
- Edge Treatment: Use a router to create rounded or beveled edges if desired. This adds a polished look to your bookshelf.
- Sand All Surfaces: Start with a coarse grit and gradually move to finer grits to achieve a smooth surface. This step is vital for a flawless finish.
Step 4: Assembling the Bookshelf
Now that your wood pieces are cut and prepped, it’s time to assemble them. The joinery methods you selected will play a key role in how the bookshelf goes together.
- Dovetail Joints: These are perfect for drawer construction, providing strength and aesthetic appeal. Use a dovetail jig for accuracy.
- Mortise and Tenon: Ideal for connecting the side panels to the shelves, ensuring stability and durability.
- Pocket Holes: Quick and easy, pocket holes are great for beginners and can be hidden with wood plugs for a clean look.
Whichever method you choose, apply wood glue generously, clamp the pieces together, and allow adequate drying time before moving on to the next step.
Step 5: Finishing Touches
A professional finish can elevate your bookshelf from functional to fabulous. Here’s how to achieve it:
- Staining or Painting: Choose a stain that complements the wood grain or a paint that matches your decor. Apply evenly and allow to dry completely.
- Topcoat: For protection, apply a clear polyurethane or lacquer finish. This will enhance durability and add a beautiful sheen.
- Hardware Installation: If your design includes doors or drawer pulls, now is the time to install them. Make sure they are aligned properly for a polished look.
With these steps complete, your custom bookshelf is ready to be filled with books, decorative items, or whatever you choose!
FAQ
- Q: How long will it take to build a custom bookshelf?
A: The time commitment can vary based on your experience level and the complexity of the design, but expect anywhere from a few days to a week. - Q: What type of wood is best for a bookshelf?
A: Hardwoods like oak or maple are ideal for durability, while softer woods like pine are easier to work with and more affordable. - Q: Can I modify the bookshelf design later on?
A: Yes! Custom bookshelves can be adapted with additional shelves or features as your needs change.
📚 Related Articles
🔨 Want 16,000+ Woodworking Plans?
Get instant access to step-by-step plans with blueprints and cut lists.
Get Instant Access →