How to Create a Wooden Garden Path: Step-by-Step Instructions for DIYers
Building a wooden garden path can transform your outdoor space, offering functionality and aesthetic appeal. This project requires careful planning, precision, and a few advanced woodworking techniques to ensure durability and a professional finish. Below, we'll guide you through creating a stunning wooden garden path that will enhance your landscape.
Materials and Tools Required
Before we begin, gather the following materials and tools:
- Materials:
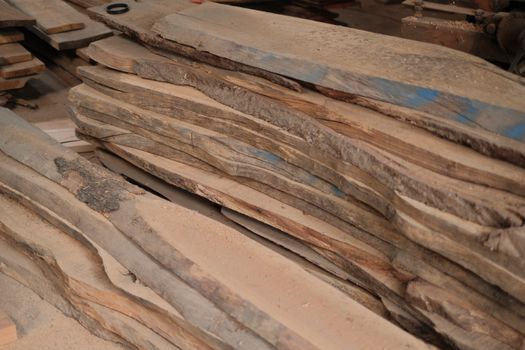
- Pressure-treated lumber (2x4s, 2x6s, or decking boards)
- Wood screws (exterior grade)
- Wood glue (exterior grade)
- Wood stain or sealant
- Landscape fabric
- Gravel or sand (for foundation)
- Optional: decorative stones or mulch for aesthetics
- Tools:
- Circular saw or miter saw
- Drill with bits
- Measuring tape
- Level
- Square
- Sawhorses
- Chisel and mallet (for joinery)
- Clamps
- Paintbrush or sprayer (for stain/sealant)
Step 1: Planning Your Path
Start by designing your garden path. Consider the shape, width, and overall layout. A meandering path can create a more natural feel, while a straight path may look more formal. Use graph paper or a design software to sketch your ideas.
Step 2: Measuring and Marking the Ground
Once you have a design, measure and mark the path on the ground using stakes and string. This will give you a clear indication of the area to work within. Ensure the path is at least 3 feet wide for comfortable walking.
Step 3: Excavating the Path
Excavate the marked area to a depth of about 4-6 inches, depending on the thickness of your lumber. This depth will accommodate both the foundation layer and the wooden boards. Remove any grass, roots, or debris, and ensure the base is level.
Step 4: Laying the Foundation
Spread a layer of gravel or sand in the excavated area for drainage. Compact this layer to create a stable base for your wooden path. Use a level to ensure an even surface, adjusting as necessary.
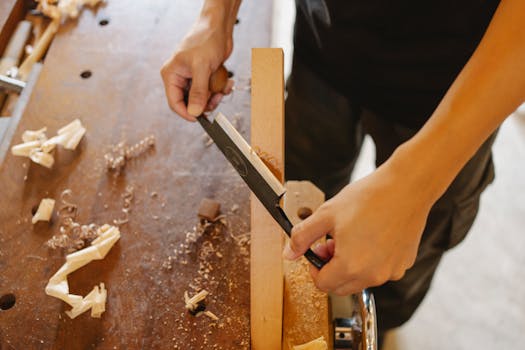
Step 5: Choosing Joinery Techniques
For a professional finish, consider advanced joinery techniques. Here are a few options:
- Half-lap joints: These joints provide strength and stability by overlapping the ends of two pieces of wood. Cut out half the thickness of each board to create a flush joint.
- Mortise and tenon joints: A classic technique that offers excellent strength. Cut a mortise hole in one piece and a corresponding tenon on another piece for a perfect fit.
- Butt joints with reinforcement: If you choose to use butt joints, reinforce them with wood glue and screws, ensuring they are flush and aligned.
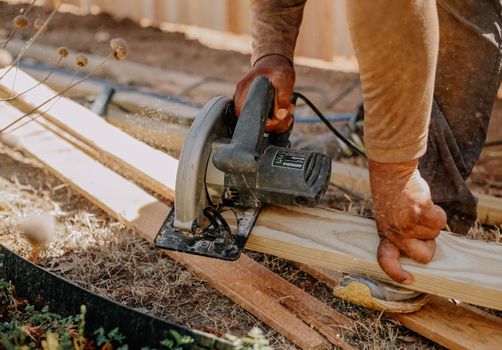
Step 6: Cutting and Assembling the Boards
Using your circular saw or miter saw, cut your lumber to the desired lengths based on your path design. Remember to account for the joinery you selected. Assemble the boards using your chosen joinery technique, ensuring all joints are tight and secure. Use clamps to hold pieces in place while the glue dries.
Step 7: Securing the Path
Once the boards are assembled, place them into the excavated area. Ensure they are level and aligned with your marked path. Secure each board to the foundation using exterior-grade screws, ensuring they penetrate the substrate for stability.
Step 8: Finishing Touches
To protect your wooden path and enhance its appearance, apply a high-quality wood stain or sealant. This will prevent rot and extend the lifespan of your garden path. Consider using a natural finish for a rustic look or a more vibrant color to make a statement. Allow the finish to dry completely before use.
Step 9: Adding Aesthetic Elements
Enhance the beauty of your wooden garden path by adding decorative elements around it. You might consider using gravel, mulch, or decorative stones alongside your path for an inviting touch. Planting flowers or low shrubs can also create a lovely border that complements the wood.
Step 10: Maintenance Tips
To keep your wooden garden path looking its best, perform regular maintenance:
- Inspect for loose boards and screws periodically.
- Reapply wood stain or sealant every few years, depending on exposure to the elements.
- Clear debris, leaves, and snow to prevent moisture retention and wood rot.
Resources for Further Learning
If you're looking for detailed plans and additional guidance, check out Ted Woodworking. This resource offers a wide variety of woodworking plans, including outdoor builds like garden paths.
Conclusion
Creating a wooden garden path is a rewarding project that enhances your outdoor space. By employing advanced joinery techniques and focusing on precision, you can achieve a professional finish that will stand the test of time. Happy woodworking!
Frequently Asked Questions
1. What type of wood is best for outdoor paths?
Pressure-treated lumber, cedar, or redwood are excellent choices for outdoor paths due to their resistance to moisture and insects.
2. How often should I reapply wood stain or sealant?
It is generally recommended to reapply wood stain or sealant every 2-3 years, depending on your local climate and exposure to the elements.
3. Can I use untreated wood for my garden path?
While untreated wood may be cheaper, it is not advisable for outdoor projects as it is prone to rot and insect damage. Always opt for treated wood for longevity.
📚 Related Articles
🔨 Want 16,000+ Woodworking Plans?
Get instant access to step-by-step plans with blueprints and cut lists.
Get Instant Access →