Understanding the Importance of Finishing in Woodworking
When it comes to woodworking, the finishing process is often overlooked. However, it's the final touches that can elevate your project from a simple piece of furniture to a stunning work of art. The right finishing techniques not only enhance the wood's natural beauty but also protect it from wear and tear. In this article, we will explore advanced finishing techniques that can bring out the best in your wood projects, focusing on joinery, precision, and achieving a professional finish.
Advanced Finishing Techniques
To achieve a flawless finish, it's essential to understand the various finishing techniques available to woodworkers. Here are some advanced methods that can significantly enhance the appearance and durability of your projects.
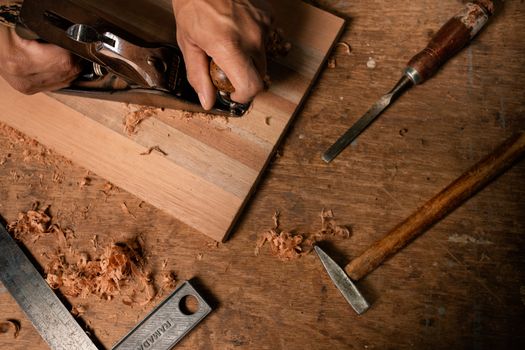
1. Sanding and Surface Preparation
The foundation of a great finish begins with proper surface preparation. Sanding is a critical step that cannot be rushed. Here are the key steps:
- Start with Coarse Grit: Begin sanding with a coarse grit (e.g., 80-120) to remove any rough spots and imperfections.
- Progress to Finer Grits: Gradually move to finer grits (up to 220 or higher) to create a smooth surface. This step is vital for achieving a professional look.
- Use a Random Orbital Sander: For larger surfaces, a random orbital sander can help save time while ensuring an even finish.
- Hand Sanding for Detail: For intricate areas and joints, hand sanding provides the control needed to avoid damaging delicate features.
2. Staining Techniques
Stains can enhance or alter the natural color of wood, allowing you to customize the final appearance of your piece. Here are some effective staining techniques:
- Pre-Stain Conditioner: Use a pre-stain conditioner to prevent blotchiness, especially with softwoods like pine and maple.
- Wipe-On Stains: These stains can provide more control over the color intensity and allow for easy blending.
- Gel Stains: Ideal for vertical surfaces, gel stains provide a uniform color without running or dripping.
- Layering Colors: Experiment with layering different stains to achieve a unique and rich finish. Always test on scrap wood first.
3. Professional Finishing Products
The choice of finishing products can greatly influence the final look and feel of your furniture. Here are some professional-grade options:
- Oil Finishes: Tung oil and boiled linseed oil penetrate deep into the wood, enhancing its natural grain while providing a subtle sheen.
- Varnishes: Polyurethane varnishes offer excellent durability and resistance to scratches and heat, making them ideal for surfaces that see heavy use.
- Lacquers: Fast-drying and easy to apply, lacquers provide a hard finish that can be polished to a high gloss.
- Shellac: This traditional finish dries quickly and is easy to repair, making it suitable for fine furniture.
4. Techniques for Achieving a Flawless Finish
Once you've selected your finishing products, employing the right application techniques is crucial. Here are some professional tips:
- Use Quality Brushes: Invest in high-quality brushes or foam applicators to avoid brush marks and achieve a smooth application.
- Thin Your Finish: For smoother application, consider thinning your finish with the appropriate solvent according to the manufacturer's instructions.
- Multiple Coats: Apply multiple thin coats rather than one thick coat. This approach helps prevent drips and unevenness.
- Sanding Between Coats: Lightly sand between coats to ensure proper adhesion and a smooth finish.
5. Joinery Considerations
The way you join pieces of wood can affect how they accept and display finishes. Here are some joinery tips:
- Choose the Right Joinery: Techniques like dovetail or mortise and tenon create tight joints that enhance aesthetics and structural integrity.
- Fill Gaps: Use wood filler to fill any gaps or imperfections in your joints before finishing to create a seamless look.
- Consider Wood Movement: Different species react differently to humidity changes. Make allowances for wood movement in your joinery for a lasting finish.
Resources for Woodworkers
If you're looking for detailed plans and guidance on advanced woodworking techniques, Ted Woodworking offers a comprehensive library of resources. From furniture designs to finishing techniques, it's a valuable tool for any serious woodworker.
Conclusion
Finishing is an art form that requires patience, precision, and a bit of practice. By utilizing advanced techniques and understanding the science behind finishes, you can bring out the best in your wood projects. Whether you're restoring a piece of vintage furniture or crafting a new item from scratch, the right finish can make all the difference.
FAQ
1. What is the best finish for outdoor furniture?
For outdoor furniture, a high-quality marine varnish or an exterior oil finish offers the best protection against weathering.
2. How can I repair a damaged finish?
To repair a damaged finish, lightly sand the area, clean it, and reapply the finish, blending it with the surrounding area.
3. How long should I wait between finish coats?
The wait time between finish coats varies by product, but generally, it's best to wait at least 4-6 hours or until the previous coat is completely dry.
📚 Related Articles
🔨 Want 16,000+ Woodworking Plans?
Get instant access to step-by-step plans with blueprints and cut lists.
Get Instant Access →