How to Plan Your First Woodworking Project in 5 Steps
Starting your first woodworking project can be both exciting and daunting. With the right planning, you can avoid common mistakes and ensure your project is a success. In this article, we will guide you through five essential steps to plan your first woodworking project effectively. We will also discuss common pitfalls and provide troubleshooting tips to help you along the way.
Step 1: Define Your Project
The first step in planning your woodworking project is to define what you want to create. Are you looking to build a simple bookshelf, a coffee table, or perhaps a chair? Consider your skill level, the tools you have available, and the space you want to fill.
- Choose a project that aligns with your skill level: If you are a beginner, start with something simple, like a small shelf or a birdhouse, to build your confidence.
- Consider your needs: What do you want from your project? Functionality, aesthetics, or both? Make sure it serves a purpose in your home.
Common Mistakes to Avoid:
- Choosing a project that’s too complex for your skill level.
- Not considering the tools and materials you have access to.
Troubleshooting Tip: If you find that your chosen project is too ambitious, don’t hesitate to scale it down or seek out simpler variations of the design.
Step 2: Gather Inspiration and Research
Once you have defined your project, it’s time to gather inspiration and research designs. Look for ideas online, in woodworking magazines, or at local furniture stores. Websites like Ted Woodworking offer a plethora of project plans that can inspire and guide you.
- Use online resources: Platforms like Pinterest and woodworking forums can provide valuable insights and visual references.
- Study existing pieces: Analyze the construction and design of furniture that you admire to understand how they are built.
Common Mistakes to Avoid:
- Not taking notes or saving images of your favorite designs.
- Overlooking the importance of understanding joinery and construction methods.
Troubleshooting Tip: Create a mood board or a digital folder to keep all your inspirations organized. This will make it easier to refer back to your ideas when drafting your plans.
Step 3: Create a Detailed Plan
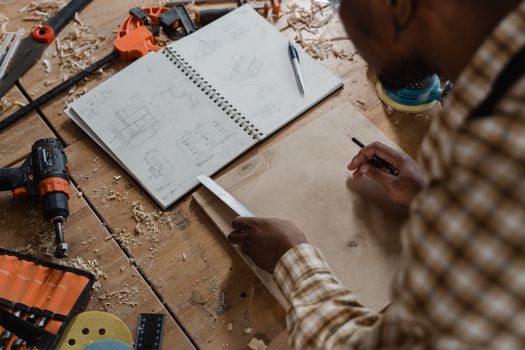
With your project defined and inspiration gathered, it's time to create a detailed plan. This step involves sketching your design, listing materials, and estimating dimensions. A good plan should include:
- Sketches: Draw your design from multiple angles, including dimensions.
- Materials list: Itemize all wood types, hardware, and finishing products you will need.
- Cut list: Plan out the sizes of each piece you will cut, which will minimize waste and save time.
Common Mistakes to Avoid:
- Not measuring accurately, leading to parts that don’t fit together.
- Failing to account for kerf (the width of the cut) when planning your cuts.
Troubleshooting Tip: Double-check your measurements and consider using a cutting diagram to visualize where each piece will come from.
Step 4: Prepare Your Workspace
A clean and organized workspace is essential for any woodworking project. Before you start, ensure you have a designated area that is free from distractions and hazards. Consider the following:
- Safety first: Ensure you have the necessary safety equipment, such as goggles and ear protection.
- Organize your tools: Keep your tools and materials close at hand to avoid unnecessary movements.
Common Mistakes to Avoid:
- Not having enough space to work comfortably.
- Ignoring safety protocols, which can lead to accidents.
Troubleshooting Tip: If your workspace is limited, consider working outdoors or in a garage where you can have more room to maneuver.
Step 5: Execute, Review, and Adjust
The final step is to execute your plan. Start cutting and assembling your project according to the detailed plans you created. As you work, review your progress regularly and be willing to make adjustments as needed. This might include:
- Adapting your design: If something doesn’t look right or fit, don’t hesitate to modify your plan.
- Taking breaks: Step back periodically to assess your work and ensure you’re on track.
Common Mistakes to Avoid:
- Rushing through the assembly process, which can lead to errors.
- Being too rigid with your plan and not allowing for creative adjustments.
Troubleshooting Tip: Keep a journal of your construction process. Write down what works and what doesn’t, so you can learn for future projects.
Conclusion
Planning your first woodworking project doesn’t have to be overwhelming. By following these five steps and being aware of common mistakes, you can set yourself up for success. Remember, the journey of woodworking is about learning and improving your skills over time. Don’t forget to explore resources like Ted Woodworking for more project plans and inspiration. Happy woodworking!
FAQ
- What tools do I need for my first woodworking project? Start with basic tools such as a saw, drill, measuring tape, and clamps. As you progress, you can invest in more specialized tools.
- How do I choose the right wood for my project? Consider the project's purpose, desired finish, and budget. Softwoods like pine are great for beginners, while hardwoods like oak offer durability.
- Can I modify my project as I go along? Absolutely! Woodworking is an art, and many experienced woodworkers adapt their designs based on materials and challenges encountered during the build.
📚 Related Articles
🔨 Want 16,000+ Woodworking Plans?
Get instant access to step-by-step plans with blueprints and cut lists.
Get Instant Access →