Introduction
Finishing is a crucial aspect of woodworking that can transform a simple piece into a stunning display. For small DIY craft projects, especially those on a budget, mastering the art of wood finishing can save you money while elevating the quality of your work. In this guide, we’ll cover some of the best wood finishing tips to help you achieve professional results without breaking the bank.
Choosing the Right Materials
When it comes to wood finishing, the materials you choose can significantly impact your budget. Here are some cost-effective options:
- Paint: Opt for water-based paints that are easy to clean up and have low VOCs. They are often more affordable and come in a variety of finishes.
- Stains: Look for water-based stains that are budget-friendly and offer great color options. They tend to be easier to apply and clean up.
- Sealants: Polyurethane is a popular sealant that provides a durable finish. Consider using a water-based polyurethane for a quicker drying time and easier application.
Preparing Your Wood
Preparation is key to achieving a great finish. Here are some tips to ensure your wood is ready:
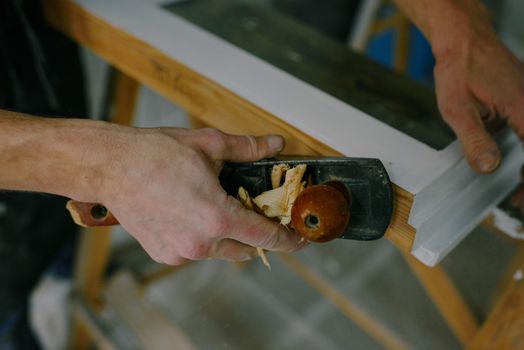
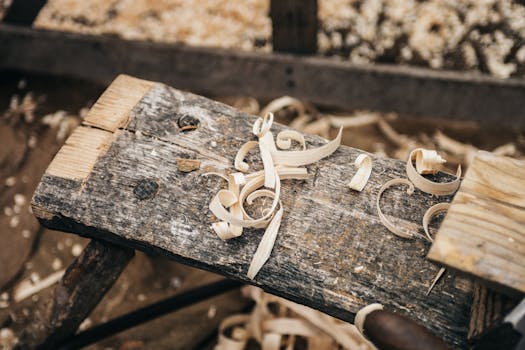
- Sanding: Start with coarse sandpaper (like 80-grit) and gradually move to finer grits (220-grit or higher) to create a smooth surface. Sanding not only prepares the wood for finishing but also enhances the wood grain.
- Cleaning: After sanding, always clean the surface with a tack cloth or a damp rag to remove any dust particles. This step prevents imperfections in the finish.
- Conditioning: For softwoods, applying a wood conditioner before staining can help achieve a more even color. This is especially useful for pine or fir.
Application Techniques
How you apply your finish can make a world of difference. Here are some techniques to consider:
- Brushes: Use high-quality brushes to apply your finish. A good brush will leave fewer streaks and provide a smoother application. Foam brushes are also a budget-friendly option for small projects.
- Rags: For stains and oils, old rags or cloths work well for application. They are inexpensive and allow for better control over the amount of product applied.
- Spraying: If you have a larger project, consider using a spray can for an even finish. While the initial investment in a sprayer may be higher, it can save time and material in the long run.
Layering for Depth
To achieve depth and richness in your finish, layering is essential. Here’s how:
- Multiple Coats: Apply multiple thin coats of stain or paint rather than one thick coat. This approach not only dries faster but also reduces the likelihood of drips and runs.
- Sealing: After the initial color coat, apply a clear sealant to protect your finish and enhance its durability. This is particularly important for items that will be used frequently.
Budget-Friendly Finishing Tips
Staying within budget while achieving a great finish is possible with these tips:
- Shop Smart: Look for sales and discounts at local hardware stores or online. Buying in bulk can also save you money in the long run.
- DIY Finishing Solutions: Consider making your own finishing products, such as a homemade wood conditioner using mineral oil and beeswax.
- Reuse and Repurpose: If you have leftover finishes from previous projects, don’t hesitate to use them. Mixing colors can lead to unique and customized finishes.
Resources for Plans
If you’re looking for inspiration for your next project, Ted Woodworking offers a vast library of plans that can guide you through the building process. With clear instructions and detailed diagrams, you can tackle new challenges confidently.
Final Touches
Once your project is finished, give it time to cure fully. This can take anywhere from a few hours to several days, depending on the products used. Ensure that your piece is in a well-ventilated area during this time to avoid any unpleasant odors.
Conclusion
Finishing your small DIY craft projects doesn’t have to be expensive. With the right materials, preparation, and techniques, you can achieve stunning results while staying within your budget. Remember to experiment and find the methods that work best for you, and don’t hesitate to explore resources like Ted Woodworking for additional support and ideas.
FAQ
- What is the best wood finish for beginners? Water-based polyurethane is a great choice for beginners due to its ease of use, quick drying time, and easy cleanup.
- How long should I wait between coats of finish? It typically depends on the product used, but a good rule of thumb is to wait at least 2-4 hours before applying the next coat.
- Can I use leftover paint for finishing? Yes, as long as the paint is still in good condition, you can use it for finishing. Just test it on a small area first to ensure it adheres well.
📚 Related Articles
🔨 Want 16,000+ Woodworking Plans?
Get instant access to step-by-step plans with blueprints and cut lists.
Get Instant Access →