Introduction
Finishing your wood projects can be one of the most rewarding parts of woodworking. Not only does it enhance the beauty of the wood, but it also protects it from wear and tear. If you're looking to achieve a natural look without breaking the bank, you're in the right place! In this article, we'll explore budget-friendly techniques and affordable materials that can help you finish your wood projects beautifully.
Why Choose a Natural Look?
A natural finish allows the beauty of the wood grain to shine through while providing a subtle protective layer. This type of finish is perfect for those who appreciate the organic qualities of wood and wish to maintain its authenticity. It also tends to be more forgiving on the budget, as many natural finishes can be made from readily available and cost-effective materials.
Materials You Will Need
Before diving into the techniques, let’s discuss some affordable materials you can use for achieving a natural finish:
- Mineral Oil: A great option for a simple, food-safe finish.
- Beeswax: Perfect for adding a soft sheen and moisture resistance.
- Shellac: A natural resin that provides a warm tone and is easy to apply.
- Varnish or Polyurethane: Look for water-based options for a clear, durable finish.
- Linseed Oil: A traditional choice that enhances grain while providing protection.
Techniques for Finishing with a Natural Look
Now that you have your materials, let’s move on to some techniques you can employ to achieve that coveted natural look.
1. Oil Finishing
Using oil to finish your wood project is one of the simplest methods. Here’s how to do it:
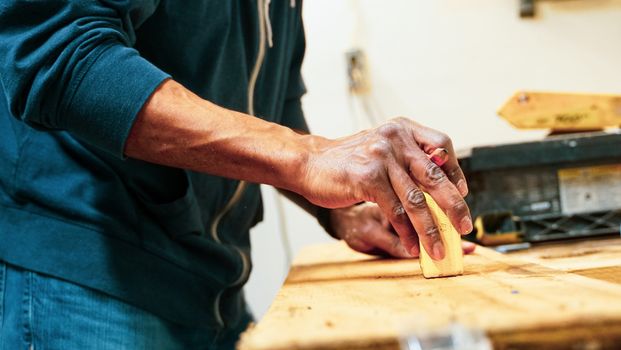
- Prep Your Wood: Sand your project thoroughly, starting with a coarse sandpaper (around 120 grit) and finishing with a fine grit (220 grit) for a smooth surface.
- Apply Mineral Oil: Using a clean cloth, apply a generous amount of mineral oil to the wood. Allow it to soak in for about 10-15 minutes.
- Buff the Surface: Wipe off any excess oil with a dry cloth, buffing the surface to a nice sheen. Repeat the process as needed.
2. Wax Finish
For a soft, natural sheen, consider using a combination of beeswax and mineral oil:
- Mix Beeswax and Oil: Melt a small amount of beeswax and mix it with mineral oil in a ratio of 1:4 (one part beeswax to four parts oil).
- Apply the Mixture: Use a cloth to rub the mixture onto the wood, ensuring even coverage.
- Let it Cure: Allow the finish to cure for a few hours before buffing with a soft cloth.
3. Shellac Application
Shellac is another excellent option for achieving a natural look:
- Prepare the Shellac: You can purchase pre-mixed shellac or mix your own using shellac flakes and denatured alcohol.
- Apply with a Brush: Use a natural bristle brush to apply a thin coat of shellac. Work in long, even strokes.
- Sand Between Coats: After the first coat dries, lightly sand with fine grit sandpaper before applying additional coats (two to three coats recommended).
4. Water-Based Finishes
For those who prefer a more durable finish without the high cost, water-based varnishes and polyurethanes are ideal:
- Select a Clear Finish: Choose a water-based product that is labeled as clear for a natural look.
- Apply Thin Coats: Using a foam brush, apply thin coats, allowing each coat to dry thoroughly before applying the next.
- Sand Between Coats: Sand lightly between coats to ensure a smooth finish.
Cost-Saving Tips
Here are some tips to save money while finishing your wood projects:
- Buy in Bulk: Purchase larger quantities of finishes or oils to save money over time.
- DIY Finishes: Consider making your own finishes from natural ingredients like oils and waxes.
- Repurpose Materials: Use leftover finishes from previous projects rather than buying new ones.
- Shop Sales: Keep an eye out for sales at local hardware stores or online retailers for discounts on finishing products.
Conclusion
Finishing your wood projects with a natural look doesn't have to be expensive. By utilizing affordable materials and employing these techniques, you can achieve a beautiful finish that highlights the inherent beauty of the wood. Remember to explore resources like Ted Woodworking for plans and ideas to inspire your next project!
FAQ
1. What is the best finish for outdoor wood projects?
For outdoor projects, a durable finish like marine varnish or a high-quality exterior-grade polyurethane is recommended, as they provide better protection against the elements.
2. How often should I reapply a finish?
The frequency of reapplication depends on the type of finish and the wear it experiences. Generally, oil finishes may need to be reapplied every 6-12 months, while varnishes can last several years.
3. Can I mix different types of finishes?
It's generally not recommended to mix different types of finishes (e.g., oil with water-based) as they may not adhere properly. Stick to one type for best results.
📚 Related Articles
🔨 Want 16,000+ Woodworking Plans?
Get instant access to step-by-step plans with blueprints and cut lists.
Get Instant Access →