How to Finish a DIY Cedar Chest: Step-by-Step Instructions
If you've built your own cedar chest, congratulations! Cedar chests are not only beautiful but also functional, providing a perfect place for storage while adding a rustic touch to your home. Finishing your DIY cedar chest will enhance its natural beauty and protect it from wear and tear. In this article, we’ll guide you through the process of finishing your cedar chest with easy-to-follow steps and minimal tools. Whether you’re a beginner or an experienced woodworker, you’ll find this guide useful.
Materials and Tools Needed
- Cedar chest (completed build)
- Sanding block or orbital sander
- Wood stain (optional)
- Wood finish (polyurethane, tung oil, or linseed oil)
- Paintbrush or foam applicator
- Clean rags
- Safety goggles and mask
- Drop cloth or newspaper
Step 1: Prepare Your Workspace
Before you start finishing your cedar chest, it's essential to prepare your workspace. Choose a well-ventilated area to work, as wood stains and finishes can emit fumes. Lay down a drop cloth or old newspapers to protect the floor from any spills.
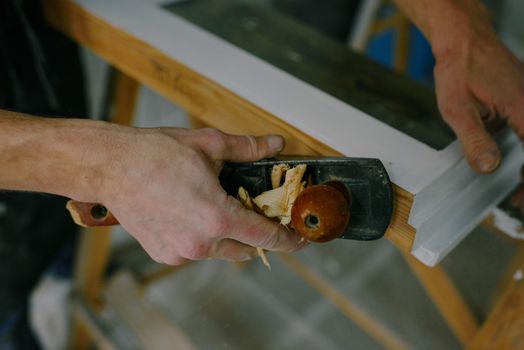
Step 2: Sand the Surface
To achieve a smooth finish, the surface of your cedar chest must be adequately sanded. Use a sanding block or an orbital sander to sand the surfaces. Start with a medium-grit sandpaper (around 120 grit) and then progress to a finer grit (220 grit) for a smooth finish. Always sand in the direction of the grain to avoid scratches.
Tip: Make sure to wear safety goggles and a mask to protect yourself from dust.
Step 3: Clean the Dust
Once sanding is complete, it's crucial to clean off all the dust. Use a clean, dry rag to wipe down the surfaces thoroughly. You can also use a tack cloth to pick up any fine dust particles. This step ensures that no dust gets trapped under your finish, resulting in a smoother final product.
Step 4: Apply Wood Stain (Optional)
If you want to enhance the natural beauty of the cedar, consider applying a wood stain. Choose a stain that complements the color of the wood. Using a paintbrush or foam applicator, apply the stain evenly in the direction of the grain. Allow it to sit for a few minutes, then wipe off excess stain with a clean rag. This will give you a richer color without overwhelming the natural grain.
Note: Always test the stain on a scrap piece of wood to ensure you like the color before applying it to your entire chest.
Step 5: Let the Stain Dry
Follow the manufacturer's instructions for drying times, usually around 4-6 hours. Ensure the environment is dust-free for best results. Proper drying is essential for the next step.
Step 6: Apply the Finish
After the stain has dried completely, it's time to apply the finish. Choose a wood finish based on your preference:
- Polyurethane: Provides a durable, water-resistant finish. It comes in oil-based or water-based options.
- Tung Oil: Penetrates the wood and offers a natural look while providing some water resistance.
- Linseed Oil: A traditional finish that enhances wood grain but may require more frequent reapplication.
Using a clean brush or foam applicator, apply the finish in thin, even coats. Be sure to follow the direction of the grain. Allow the first coat to dry as per the instructions on the container.
Step 7: Sand Between Coats
After the first coat is dry, lightly sand the surface with fine-grit sandpaper (320 grit). This helps to create a smooth surface for the next coat. Wipe off any dust with a clean rag before applying additional coats.
Step 8: Apply Additional Coats
Apply at least two to three additional coats of your chosen finish, sanding between each coat. This will provide a durable and beautiful finish that will protect your cedar chest for years to come.
Step 9: Final Drying
Once you have completed all the coats, allow the chest to dry thoroughly. This could take a couple of days, depending on the finish used. Make sure it is in a well-ventilated area, away from dust and direct sunlight.
Step 10: Enjoy Your Finished Cedar Chest
Your DIY cedar chest is now finished! Enjoy the beauty and functionality it brings to your home. Don’t forget to store your cherished items inside and admire your handiwork.
Additional Resources
If you’re looking for more detailed plans or ideas, consider checking out Ted Woodworking. They offer a variety of woodworking plans that can help you with future projects.
FAQ
1. How long does it take for the finish to dry?
The drying time varies depending on the type of finish used. Generally, it takes 4-6 hours for each coat to dry, but it's best to allow 24 hours for a full cure.
2. Can I use a spray finish instead of a brush-on finish?
Yes, a spray finish can be a good option if you prefer a quick application. Just ensure you apply it in thin, even coats and in a well-ventilated area.
3. How often should I reapply the finish on my cedar chest?
Typically, you should reapply the finish every few years, depending on wear and tear. Regular maintenance will keep your cedar chest looking great.
📚 Related Articles
🔨 Want 16,000+ Woodworking Plans?
Get instant access to step-by-step plans with blueprints and cut lists.
Get Instant Access →