Understanding Wood Finishing
Wood finishing is an essential part of any woodworking project. It not only enhances the beauty of the wood but also protects it from damage. However, many DIY enthusiasts make common mistakes that can ruin their hard work. In this article, we will explore the top wood finishing mistakes to avoid and provide troubleshooting tips to help you achieve the perfect finish.
Top Wood Finishing Mistakes
1. Skipping Surface Preparation
One of the biggest mistakes is neglecting surface preparation. Before applying any finish, the wood surface must be clean, smooth, and free of dust and debris. Failing to do so can lead to an uneven finish.
- Tip: Always sand the surface with progressively finer grits and wipe it down with a tack cloth to remove dust.
2. Applying Finish in Poor Conditions
Humidity and temperature can significantly affect the application and drying of finishes. Applying a finish in high humidity or low temperatures can lead to problems like bubbling or improper adhesion.
- Tip: Aim to finish your project in a controlled environment with temperatures between 70°F and 80°F and low humidity.
3. Using the Wrong Type of Finish
Not all finishes are suitable for every project. For instance, an oil-based finish might be perfect for a rustic table but unsuitable for a kitchen cabinet where moisture is a concern.
- Tip: Research the types of finishes available and choose the one that best suits your project’s use and environment.
4. Over-applying Finish
Another common mistake is applying too much finish in one coat. This can lead to drips, runs, and an uneven appearance. Less is often more when it comes to finishing.
- Tip: Apply thin coats and allow adequate drying time between applications. This will ensure a smoother finish.
5. Neglecting to Test the Finish
Failing to test your finish on a scrap piece of wood can lead to unexpected results. The wood species, grain, and previous treatments can all affect how the finish appears.
- Tip: Always test your finish on a scrap piece of the same wood to evaluate the color and sheen before applying it to your project.
6. Ignoring Safety Precautions
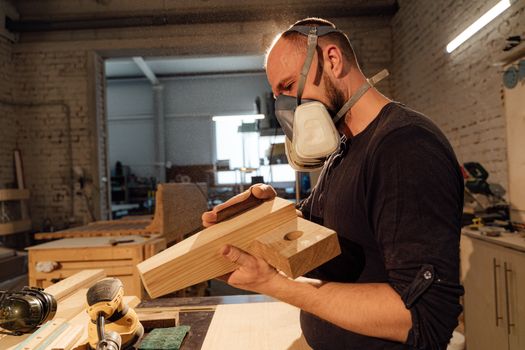
Many DIYers forget about safety when working with finishes, which can be harmful due to fumes and chemicals. Ignoring proper ventilation or protective gear can lead to health risks.
- Tip: Work in a well-ventilated area and use appropriate safety gear, such as gloves and masks, to protect yourself.
7. Rushing the Drying Process
Patience is key in wood finishing. Rushing the drying process by applying heat or skipping drying times can lead to a flawed finish.
- Tip: Allow finishes to dry fully as per the manufacturer’s instructions before sanding or applying additional coats.
8. Forgetting to Clean Brushes and Tools
Neglecting to clean your brushes and tools can lead to contamination in your finish, affecting the final result. Old paint or finish residue can create imperfections on your project.
- Tip: Clean your brushes and tools immediately after use according to the type of finish used (water-based or oil-based).
9. Overlooking Final Touches
After finishing, many DIYers forget to check for imperfections or do touch-ups. Small flaws can become very noticeable once the finish is applied.
- Tip: Inspect your work for any inconsistencies and address them with a fine sanding and an additional coat if necessary.
10. Not Using Quality Plans and Resources
Lastly, not utilizing quality resources can lead to mistakes in the finishing process. Incomplete knowledge about techniques and materials can result in poor outcomes.
- Tip: Consider using comprehensive plans from resources like Ted Woodworking to ensure that you have the necessary guidance and details for your projects.
Troubleshooting Common Finishing Issues
Bubbles in the Finish
Bubbles can appear due to applying finish too quickly or in humid conditions. To fix this, sand down the area once the finish is dry, then reapply a thin coat.
Uneven Color or Sheen
If your finish appears uneven, this may be due to insufficient surface preparation or application. Lightly sand the area and apply an additional coat to even it out.
Sticky Finish
A sticky finish often occurs from not allowing sufficient drying time or over-applying the finish. If this happens, you may need to strip the finish and start over or lightly sand the surface to remove the stickiness.
Conclusion
Wood finishing is a delicate process that can greatly enhance the beauty and longevity of your projects. By avoiding these common mistakes and following the troubleshooting tips provided, you can achieve a stunning finish that showcases your woodworking skills. Remember, patience and preparation are key to successful wood finishing!
FAQ
1. What is the best finish for outdoor furniture?
For outdoor furniture, a good choice is a marine varnish or an oil-based finish designed for exterior use, as they provide excellent protection against moisture and UV rays.
2. How can I fix a scratched finish?
You can fix a scratched finish by lightly sanding the area with fine-grit sandpaper and then applying a matching finish, blending it with the surrounding area.
3. How long should I wait between finish coats?
Typically, you should wait at least 4-6 hours between coats, but it's best to refer to the manufacturer's instructions for specific drying times.
📚 Related Articles
🔨 Want 16,000+ Woodworking Plans?
Get instant access to step-by-step plans with blueprints and cut lists.
Get Instant Access →